Home assistant add-on: Inadyn
I maintain this and other Home Assistant add-ons in my free time: keeping up with upstream changes, HA changes, and testing on real hardware takes a lot of time (and some money). I use around 5-10 of my >110 addons so regularly I install test machines (and purchase some test services such as vpn) that I don't use myself to troubleshoot and improve the addons
If this add-on saves you time or makes your setup easier, I would be very grateful for your support!
Addon informations


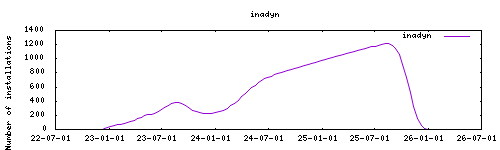
Thanks to everyone having starred my repo! To star it click on the image below, then it will be on top right. Thanks!

About
Inadyn, or In-a-Dyn, is a small and simple Dynamic DNS, DDNS, client with HTTPS support. Commonly available in many GNU/Linux distributions, used in off the shelf routers and Internet gateways to automate the task of keeping your Internet name in sync with your public¹ IP address. It can also be used in installations with redundant (backup) connections to the Internet. Based on https://hub.docker.com/r/troglobit/inadyn Project house : https://github.com/troglobit/inadyn Some code borrowed from https://github.com/nalipaz/hassio-addons
Installation
The installation of this add-on is pretty straightforward and not different in comparison to installing any other Hass.io add-on.
- Add my add-ons repository to your home assistant instance (in supervisor addons store at top right, or click button below if you have configured my HA)

- Install this add-on.
- Click the
Savebutton to store your configuration. - Start the add-on.
- Check the logs of the add-on to see if everything went well.
- Carefully configure the add-on to your preferences, see the official documentation for for that.
Configuration
Use the add-on env_vars option to pass extra environment variables (uppercase or lowercase names). See https://github.com/alexbelgium/hassio-addons/wiki/Add-Environment-variables-to-your-Addon-2 for details.
This addon has no web interface - all configuration is done through addon options. For detailed configuration information, see the official documentation.
Options
| Option | Type | Default | Description |
|---|---|---|---|
verify_address |
bool | Verify the IP address with check IP service | |
fake_address |
bool | Use fake address for testing | |
allow_ipv6 |
bool | Enable IPv6 support | |
iface |
str | Network interface to use (e.g., eth0) |
|
iterations |
int | Number of iterations (0 = infinite) | |
period |
int | 300 |
Update period in seconds |
forced_update |
int | Forced update interval in seconds | |
secure_ssl |
bool | Enable secure SSL verification | |
providers |
list | List of DDNS provider configurations |
Provider Configuration
Each provider in the providers list supports these options:
| Option | Type | Description |
|---|---|---|
provider |
str | Provider name or custom identifier |
custom_provider |
bool | Whether this is a custom provider |
username |
str | Username or token for authentication |
password |
str | Password or API key |
hostname |
str | Domain/hostname to update |
ssl |
bool | Use SSL for updates |
ddns_server |
str | Custom DDNS server |
ddns_path |
str | Custom update path |
checkip_server |
str | Custom IP check server |
checkip_path |
str | Custom IP check path |
checkip_ssl |
bool | Use SSL for IP checking |
append_myip |
bool | Append IP to request |
Example Configurations
{
  "verify_address": false,
  "fake_address": false,
  "allow_ipv6": true,
  "iface": "eth0",
  "iterations": 0,
  "period": 300,
  "forced_update": 300,
  "secure_ssl": true,
  "providers": [
    {
      "provider": "providerslug",
      "custom_provider": false,
      "username": "yourusername",
      "password": "yourpassword_or_token",
      "ssl": true,
      "hostname": "dynamic-subdomain.example.com",
      "checkip_ssl": false,
      "checkip_server": "api.example.com",
      "checkip_command": "/sbin/ifconfig eth0 | grep 'inet6 addr'",
      "checkip_path": "/",
      "user_agent": "Mozilla/5.0",
      "ddns_server": "ddns.example.com",
      "ddns_path": "",
      "append_myip": false
    }
  ]
}
You should not fill in all of these, only use what is necessary. A typical example would look like:
{
    {
      "provider": "duckdns",
      "username": "your-token",
      "hostname": "sub.duckdns.org"
    }
}
or:
{
  "providers": [
    {
      "provider": "someprovider",
      "username": "username",
      "password": "password",
      "hostname": "your.domain.com"
    }
  ]
}
for a custom provider that is not supported by inadyn you can do:
{
  "providers": [
    {
      "provider": "arbitraryname",
      "username": "username",
      "password": "password",
      "hostname": "your.domain.com",
      "ddns_server": "api.cp.easydns.com",
      "ddns_path": "/somescript.php?hostname=%h&myip=%i",
      "custom_provider": true
    }
  ]
}
the tokens in ddns_path are outlined in the inadyn.conf(5) man page.
Multiple subdomains with same provider
Related to https://github.com/troglobit/inadyn#example
If you want use this add-on with several subdomains with the same provider, you have to enumerate domains like:
{
  "providers": [
    {
      "hostname": "first.mydomain.dev",
      "provider": "domains.google.com:1",
      "username": "xxxxxxxxxxxxxxxx",
      "password": "xxxxxxxxxxxxxxxx"
    },
    {
      "hostname": "second.mydomain.dev",
      "provider": "domains.google.com:2",
      "username": "xxxxxxxxxxxxxxxx",
      "password": "xxxxxxxxxxxxxxxx"
    },
    {
      "hostname": "another.mydomain.dev",
      "provider": "domains.google.com:3",
      "username": "xxxxxxxxxxxxxxxx",
      "password": "xxxxxxxxxxxxxxxx"
    }
  ]
}