Home assistant add-on: Birdnet-Go
I maintain this and other Home Assistant add-ons in my free time: keeping up with upstream changes, HA changes, and testing on real hardware takes a lot of time (and some money). I use around 5-10 of my >110 addons so regularly I install test machines (and purchase some test services such as vpn) that I don't use myself to troubleshoot and improve the addons
If this add-on saves you time or makes your setup easier, I would be very grateful for your support!
Addon informations


Thanks to everyone having starred my repo! To star it click on the image below, then it will be on top right. Thanks!

About
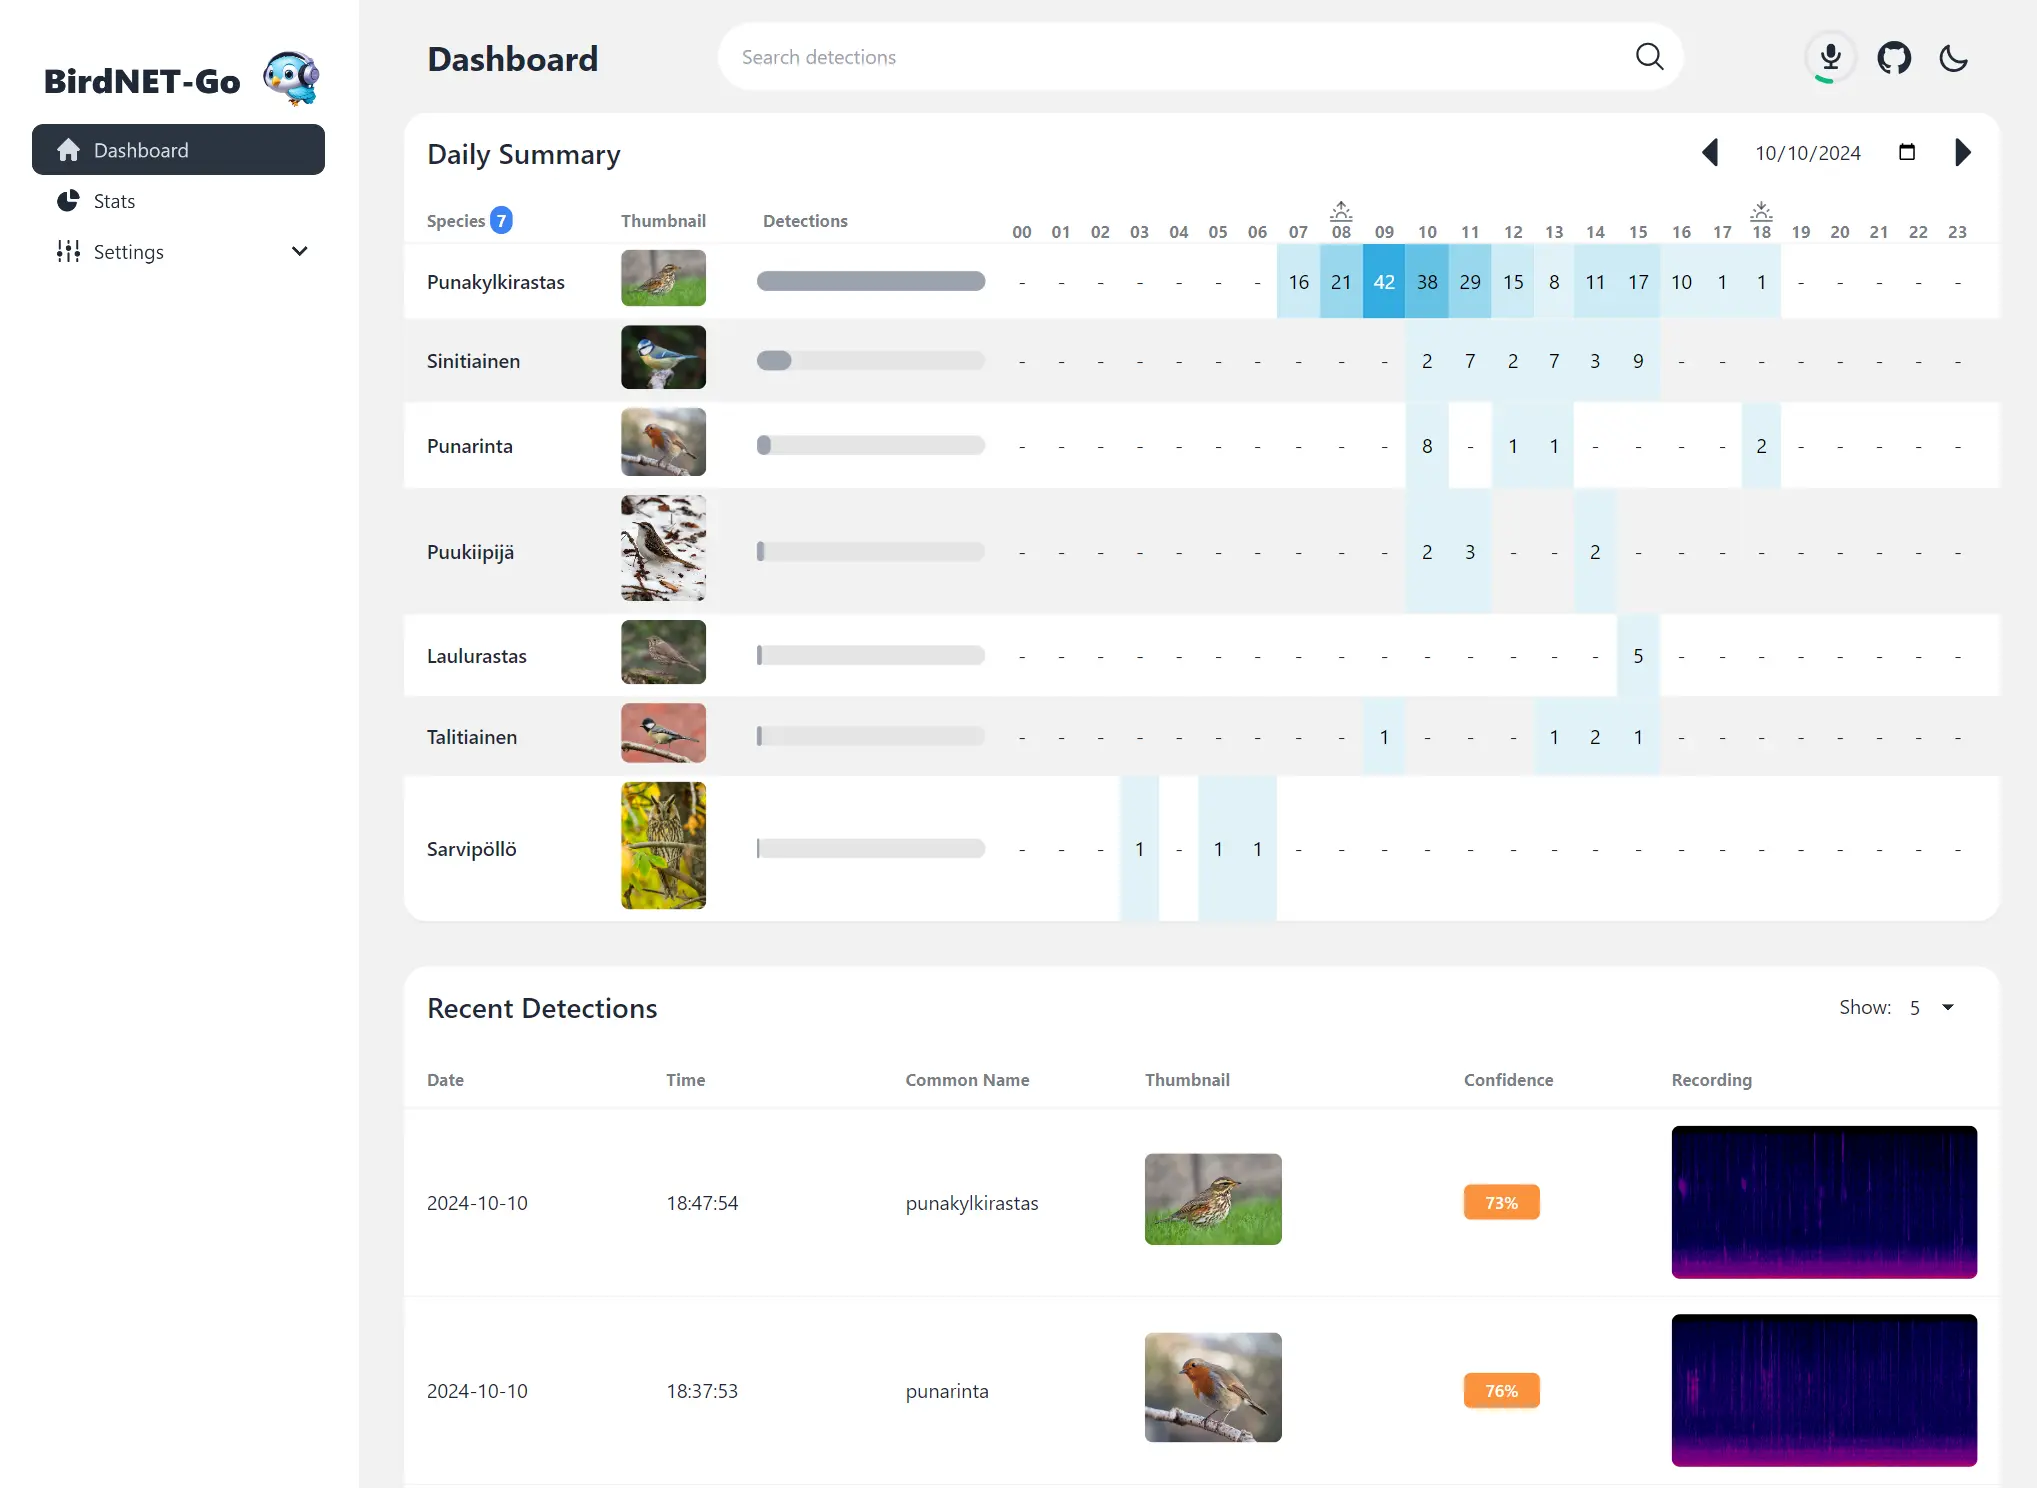
BirdNET-Go is an AI solution for continuous avian monitoring and identification developed by @tphakala
This addon is based on their docker image.
Configuration
Install, then start the addon a first time. Webui can be found at http://homeassistant:8080. You'll need a microphone : either use one connected to HA or the audio stream of a rstp camera.
The audio clips folder can be stored on an external or SMB drive by mounting it from the addon options, then specifying the path instead of "clips/". For example, "/mnt/NAS/Birdnet/"
Options can be configured through three ways :
- Addon options
BIRDSONGS_FOLDER: /config/clips # where audio clips are stored (can be on a mounted drive)
LOG_MAX_SIZE_MB: 50 # max log file size before rotation
LOG_MAX_AGE_DAYS: 7 # max log retention in days
homeassistant_microphone: false # when true, force audio source to "default" (HA microphone)
env_vars: [] # extra environment variables to pass to the container
TZ: Etc/UTC # timezone, see https://en.wikipedia.org/wiki/List_of_tz_database_time_zones#List
mqtt_auto_config: false # set true to auto-wire the Home Assistant MQTT addon into config.yaml
mariadb_auto_config: false # set true to auto-wire the Home Assistant MariaDB addon into config.yaml (also disables SQLite)
-
Config.yaml Additional variables can be configured using the config.yaml file found in /config/db21ed7f_birdnet-go/config.yaml using the Filebrowser addon
-
Config_env.yaml Additional environment variables can be configured there
MQTT and MariaDB auto-configuration (opt-in)
If the Home Assistant MQTT addon is installed and running and you set mqtt_auto_config: true in the addon options, the addon writes the HA Mosquitto credentials directly into BirdNET-Go's config.yaml on every startup: realtime.mqtt.enabled, broker, username, and password are populated, and the topic defaults to birdnet. When the option is false (the default), the addon still logs the broker details and reminds you about the option whenever Mosquitto is detected — nothing is written.
If the Home Assistant MariaDB addon is installed and running and you set mariadb_auto_config: true, the addon writes the HA credentials into output.mysql.* and sets output.sqlite.enabled to false (database name birdnet, created on first connect). When the option is false (the default), the addon only logs the credentials so you can configure them manually.
The addon also seeds output.sqlite.path and logging.file_output.* defaults only when those keys are missing from config.yaml, so values you change through the BirdNET-Go UI now survive container restarts.
Mounting Drives
This addon supports mounting both local drives and remote SMB shares:
- Local drives: See Mounting Local Drives in Addons
- Remote shares: See Mounting Remote Shares in Addons
Custom Scripts and Environment Variables
This addon supports custom scripts and environment variables through the addon_config mapping:
- Custom scripts: See Running Custom Scripts in Addons
- env_vars option: Use the add-on
env_varsoption to pass extra environment variables (uppercase or lowercase names). See https://github.com/alexbelgium/hassio-addons/wiki/Add-Environment-variables-to-your-Addon-2 for details.
Installation
The installation of this add-on is pretty straightforward and not different in comparison to installing any other add-on.
-
Add my add-ons repository to your home assistant instance (in supervisor addons store at top right, or click button below if you have configured my HA)

-
Install this add-on.
-
Click the
Savebutton to store your configuration. -
Set the add-on options to your preferences
-
Start the add-on.
-
Check the logs of the add-on to see if everything went well.
-
Open the webUI and adapt the software options
Integration with HA
Home Assistant Integration instructions are found here, Birdnet-Go Addon: Home Assistant Integration
Setting up a RTSP Source using VLC
VLC opens a TCP port but the stream is udp. Because of this will need to configure Birdnet-Go to use udp. Adjust the config.yaml file to udp or use the birdnet-go command line option:
--rtsptransport udp --rtsp rtsp://192.168.1.21:8080/stream.sdp
Linux instructions
Run vlc without an interface using one of these commands:
# This should work for most devices
/usr/bin/vlc -I dummy -vvv alsa://hw:0,0 --no-sout-all --sout-keep --sout '#transcode{acodec=mpga}:rtp{sdp=rtsp://:8080/stream.sdp}'

# Try this if the first command does not work
/usr/bin/vlc -I dummy -vvv alsa://hw:4,0 --no-sout-all --sout-keep --sout '#rtp{sdp=rtsp://:8080/stream.sdp}'
Run arecord -l to get microphone hardware info
**** List of CAPTURE Hardware Devices ****
card 0: PCH [HDA Intel PCH], device 0: ALC3220 Analog [ALC3220 Analog]
  Subdevices: 1/1
  Subdevice #0: subdevice #0
card 2: S7 [SteelSeries Arctis 7], device 0: USB Audio [USB Audio]
  Subdevices: 1/1
  Subdevice #0: subdevice #0
card 3: Nano [Yeti Nano], device 0: USB Audio [USB Audio]
  Subdevices: 1/1
  Subdevice #0: subdevice #0
card 4: Device [USB PnP Sound Device], device 0: USB Audio [USB Audio]
  Subdevices: 0/1
  Subdevice #0: subdevice #0
hw:4,0 = card 4: Device [USB PnP Sound Device], device 0: USB Audio [USB Audio]
Systemd service file example. Adjust the user:group accordingly. If you want to run as root, you will likely need to run vlc-wrapper instead of vlc.
[Unit]
Description=VLC Birdnet RTSP Server
Wants=network-online.target
After=network-online.target

[Service]
Type=simple
StandardOutput=journal
ExecStart=/usr/bin/vlc -I dummy -vvv alsa://hw:0,0 --sout '#transcode{acodec=mpga}:rtp{sdp=rtsp://:8080/stream.sdp}'
User=someone
Group=somegroup

[Install]
WantedBy=multi-user.target
Common issues
Not yet available
Support
Create an issue on github