Home assistant add-on: Immich Frame
I maintain this and other Home Assistant add-ons in my free time: keeping up with upstream changes, HA changes, and testing on real hardware takes a lot of time (and some money). I use around 5-10 of my >110 addons so regularly I install test machines (and purchase some test services such as vpn) that I don't use myself to troubleshoot and improve the addons
If this add-on saves you time or makes your setup easier, I would be very grateful for your support!
Addon informations


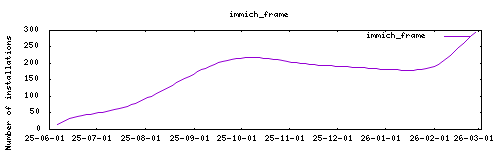
Thanks to everyone having starred my repo! To star it click on the image below, then it will be on top right. Thanks!

About
Immich Frame displays your Immich gallery as a digital photo frame. Transform any screen into a beautiful, rotating display of your personal photos and memories stored in Immich.
This addon allows you to create a digital photo frame that connects to your Immich server and displays your photos in a slideshow format, perfect for repurposing old tablets or monitors as dedicated photo displays.
Configuration
Webui can be found at <your-ip>:8171.
Options
Connection
| Option | Type | Description |
|---|---|---|
ImmichServerUrl |
str | URL of your Immich server (e.g., http://homeassistant:3001). Used for single-account setup. |
ApiKey |
str | Immich API key for authentication. Used for single-account setup. |
Accounts |
list | List of Immich accounts for multi-account support. Each entry requires ImmichServerUrl and ApiKey, plus optional per-account filters (see below). |
TZ |
str | Timezone (e.g., Europe/London) |
General (Display) Options
These top-level options map to ImmichFrame's General settings and control the display behavior:
| Option | Type | Default | Description |
|---|---|---|---|
Interval |
int | 45 | Image display interval in seconds |
TransitionDuration |
float | 2 | Transition duration in seconds |
ShowClock |
bool | true | Display the current time |
ClockFormat |
str | hh:mm |
Time format for the clock |
ClockDateFormat |
str | eee, MMM d |
Date format for the clock |
ShowProgressBar |
bool | true | Display the progress bar |
ShowPhotoDate |
bool | true | Display the date of the current image |
PhotoDateFormat |
str | MM/dd/yyyy |
Date format for photo dates |
ShowImageDesc |
bool | true | Display image description |
ShowPeopleDesc |
bool | true | Display people names |
ShowTagsDesc |
bool | true | Display tag names |
ShowAlbumName |
bool | true | Display album names |
ShowImageLocation |
bool | true | Display image location |
ShowWeatherDescription |
bool | true | Display weather description |
ImageZoom |
bool | true | Zoom into images for a touch of life |
ImagePan |
bool | false | Pan images in a random direction |
ImageFill |
bool | false | Fill available space (may crop) |
PlayAudio |
bool | false | Play audio for videos with audio tracks |
PrimaryColor |
str | #f5deb3 |
Primary UI color (hex) |
SecondaryColor |
str | #000000 |
Secondary UI color (hex) |
Style |
str | none |
Background style: none, solid, transition, blur |
Layout |
str | splitview |
Layout: single or splitview |
BaseFontSize |
str | 17px |
Base font size (CSS format) |
Language |
str | en |
2-digit ISO language code |
WeatherApiKey |
str | OpenWeatherMap API key | |
UnitSystem |
str | imperial |
imperial or metric |
WeatherLatLong |
str | Weather location as lat,lon |
|
ImageLocationFormat |
str | City,State,Country |
Location display format |
DownloadImages |
bool | false | Download images to server |
RenewImagesDuration |
int | 30 | Re-download images after this many days |
RefreshAlbumPeopleInterval |
int | 12 | Hours between album/people refresh |
Per-Account Options
These options can be set within each Accounts entry to control which images are shown:
| Option | Type | Description |
|---|---|---|
Albums |
str | Comma-separated album UUIDs |
ExcludedAlbums |
str | Comma-separated excluded album UUIDs |
People |
str | Comma-separated people UUIDs |
Tags |
str | Comma-separated tag paths (e.g., Vacation,Travel/Europe) |
ShowFavorites |
bool | Show favorite images |
ShowMemories |
bool | Show memory images |
ShowArchived |
bool | Show archived images |
ShowVideos |
bool | Include video assets |
ImagesFromDays |
int | Show images from the last X days |
ImagesFromDate |
str | Show images after this date |
ImagesUntilDate |
str | Show images before this date |
Rating |
int | Filter by star rating (-1 to 5) |
Single Account Example
ImmichServerUrl: "http://homeassistant:3001"
ApiKey: "your-immich-api-key-here"
TZ: "Europe/London"
ShowClock: false
Interval: 30
PhotoDateFormat: "dd/MM/yyyy"
Multi-Account Example
To display photos from multiple Immich accounts (e.g., you and your partner), use the Accounts list:
Accounts:
  - ImmichServerUrl: "http://homeassistant:3001"
    ApiKey: "api-key-for-user-1"
    Albums: "album-uuid-1,album-uuid-2"
    ShowFavorites: true
  - ImmichServerUrl: "http://homeassistant:3001"
    ApiKey: "api-key-for-user-2"
    People: "person-uuid-1,person-uuid-2"
ShowClock: false
Interval: 40
TZ: "Europe/London"
When using the Accounts list, the ApiKey and ImmichServerUrl top-level options are not needed. Images will be drawn from each account proportionally based on the total number of images present in each account.
For more configuration options, see the ImmichFrame documentation.
Getting Your Immich API Key
- Open your Immich web interface
- Go to Administration > API Keys
- Click Create API Key
- Give it a descriptive name (e.g., "Photo Frame")
- Copy the generated API key and paste it in the addon configuration
Custom Scripts and Environment Variables
This addon supports custom scripts and environment variables through the addon_config mapping:
- Custom scripts: See Running Custom Scripts in Addons
- env_vars option: Use the add-on
env_varsoption to pass extra ImmichFrame settings not available in the addon UI. Environment variables are automatically classified as General or Account-level settings and written toSettings.yaml. See https://github.com/alexbelgium/hassio-addons/wiki/Add-Environment-variables-to-your-Addon-2 for details.
env_vars example (for settings not in the UI):
env_vars:
  - name: AuthenticationSecret
    value: "my-secret"
  - name: Webhook
    value: "http://example.com/notify"
Installation
The installation of this add-on is pretty straightforward and not different in comparison to installing any other Hass.io add-on.
- Add my add-ons repository to your home assistant instance (in supervisor addons store at top right, or click button below if you have configured my HA)

- Install this add-on.
- Configure your Immich server URL and API key.
- Click the
Savebutton to store your configuration. - Start the add-on.
- Check the logs of the add-on to see if everything went well.
- Open the webUI to configure your photo frame settings.
Support
Create an issue on github, or ask on the home assistant community forum
For more information about Immich Frame, visit: https://immichframe.online/