⚠ Open Issue : 🐛 [LINKWARDEN] Never use STORAGE_FOLDER (opened 2025-10-11) by @guimex22
Home assistant add-on: Linkwarden
💖 Support development
I maintain this and other Home Assistant add-ons in my free time: keeping up with Immich changes, HA changes, and testing on real hardware takes a lot of time (and some money).
If this add-on saves you time or makes your setup easier, you can support my work here:


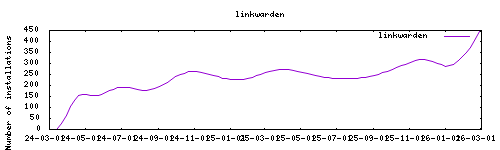
Thanks to everyone having starred my repo! To star it click on the image below, then it will be on top right. Thanks!

About
Linkwarden is a collaborative bookmark manager to collect, organize, and preserve webpages and articles. It allows teams and individuals to save, categorize, and manage bookmarks with features like tags, collections, and full-text search capabilities.
This addon is based on the official Linkwarden Docker image.
Configuration
Webui can be found at <your-ip>:3000 or through the sidebar using Ingress.
You'll need to create a new user account at startup.
Options
| Option | Type | Default | Description |
|---|---|---|---|
NEXTAUTH_SECRET |
str | Required | Secret key for NextAuth.js authentication (must be filled at start) |
NEXTAUTH_URL |
str | Custom NextAuth URL (optional, only if Linkwarden is kept externally) | |
NEXT_PUBLIC_DISABLE_REGISTRATION |
bool | false |
Disable new user registration |
NEXT_PUBLIC_CREDENTIALS_ENABLED |
bool | true |
Enable username/password login |
STORAGE_FOLDER |
str | /config/library |
Directory for storing data files |
DATABASE_URL |
str | External PostgreSQL database URL (leave blank for internal database) | |
NEXT_PUBLIC_AUTHENTIK_ENABLED |
bool | false |
Enable Authentik SSO integration |
AUTHENTIK_CUSTOM_NAME |
str | Authentik |
Custom provider name for Authentik button |
AUTHENTIK_ISSUER |
str | Authentik OpenID Configuration Issuer URL | |
AUTHENTIK_CLIENT_ID |
str | Client ID from Authentik Provider Overview | |
AUTHENTIK_CLIENT_SECRET |
str | Client Secret from Authentik Provider Overview | |
NEXT_PUBLIC_OLLAMA_ENDPOINT_URL |
str | Ollama endpoint URL for AI features | |
OLLAMA_MODEL |
str | Ollama model name for AI processing |
Example Configuration
NEXTAUTH_SECRET: "your-very-long-secret-key-here-at-least-32-characters"
NEXT_PUBLIC_DISABLE_REGISTRATION: false
NEXT_PUBLIC_CREDENTIALS_ENABLED: true
STORAGE_FOLDER: "/config/library"
DATABASE_URL: "postgresql://postgres:homeassistant@localhost:5432/linkwarden"
NEXT_PUBLIC_AUTHENTIK_ENABLED: false
AUTHENTIK_CUSTOM_NAME: "My Authentik"
AUTHENTIK_ISSUER: "https://authentik.my-domain.com/application/o/linkwarden"
AUTHENTIK_CLIENT_ID: "your-client-id"
AUTHENTIK_CLIENT_SECRET: "your-client-secret"
Setup Steps
- First Time Setup: After starting the addon, visit the web interface and create your first user account
- NEXTAUTH_SECRET: Generate a secure random string (at least 32 characters) for the
NEXTAUTH_SECREToption - Database: By default, Linkwarden uses an internal SQLite database. For production use, consider setting up PostgreSQL
- Authentication: Configure Authentik integration if you want SSO capabilities
- Storage: Bookmark data and files are stored in the configured
STORAGE_FOLDER
Custom Scripts and Environment Variables
This addon supports custom scripts and environment variables through the addon_config mapping:
- Custom scripts: See Running Custom Scripts in Addons
- env_vars option: Use the add-on
env_varsoption to pass extra environment variables (uppercase or lowercase names). See https://github.com/alexbelgium/hassio-addons/wiki/Add-Environment-variables-to-your-Addon-2 for details.
Authentik Integration
To integrate with Authentik for Single Sign-On:
- Follow the instructions from the Linkwarden documentation
- Set
NEXT_PUBLIC_AUTHENTIK_ENABLEDtotrue - Configure the Authentik-specific options with values from your Authentik Provider Overview
- Note: Remove the trailing "/" from the
AUTHENTIK_ISSUERURL
Additional Configuration
For advanced configuration options, refer to the complete list of environment variables in the Linkwarden documentation.
Installation
The installation of this add-on is pretty straightforward and not different in comparison to installing any other Hass.io add-on.
- Add my Hass.io add-ons repository to your Hass.io instance.
- Install this add-on.
- Click the
Savebutton to store your configuration. - Set the
NEXTAUTH_SECREToption to a secure random string. - Configure other options as needed.
- Start the add-on.
- Check the logs of the add-on to see if everything went well.
- Open the webUI and create your first user account.
Support
Create an issue on github, or ask on the home assistant thread.
